Thursday, December 13, 2012

Cell Phone Finger Switch! Scoliosis Exercise

If you are anything like me, you spend way too much time perusing the litany of applications available on your cell phone. I wonder how much time I actually spend holding my cell phone in my right hand with my head slightly cocked to the left (and downward, of course) enjoying my Droid delights.

I've started trying something new when I'm tapping away at my cell phone screen: using my OTHER, NON-DOMINANT HAND.

Hm. You might be thinking, "Could something so seemingly minor really be sufficient to be called an EXERCISE?" I say oh, yes indeed.

My left curving scoliosis basically dictates the way I carry my body especially in those nuanced, not-obvious-until-it's-painfully-obvious ways.

So, what do I mean by "finger switch"? Well, I always hold my cell phone in my right hand and text / scroll / maneuver with my right thumb. Seems pretty obvious given I'm a righty. But, if I move my phone to my left hand and start scrolling / maneuvering with my left thumb, then the real fun begins.

Physical Effects of the Cell Phone Finger Switch:

1) Instead of my spine curving to the left, it begins to straighten and I feel a stretch through my tight right back.

2) Instead of my left ear hovering near my left shoulder, space is magically created and my head (ears) are more evenly balanced over my shoulders.

I like to take this feeling a bit further and deliberately edge my right ear to my right shoulder just enough to feel a stretch in my right back.

3) My left shoulder, which apparently I've neglected to use over the years, finally has a change to show me what it can do with fine motor movements.

I find it very effective to keep my left elbow close to or even touching my body. In this position, moving my thumb takes more effort than I'd expect, but I like the feeling because I know it's giving my left side some long-needed working out.

All of the above effects feel even better when I raise my phone higher up, closer to eye level. Not to mention, moving my phone higher up is helping me get rid of my unsightly forward head induced neck hump and reduces the potential for migraines.

Give it a shot: try holding your cell phone in your left hand (or whichever side you don't normally use), even if just for a minute.

Hope you feel something good!

Tuesday, December 11, 2012

Let's Do the Time Warp Again! Scoliosis and TMJ Exercise

Fun memories provide for great inspiration. Everyone has heard of the Rocky Horror Picture Show. Some of us (yours truly) have had the pleasure (or horror, depending on your personal preferences) of dancing in the theater aisles to that classic track "The Time Warp." It's been awhile since I've been in a midnight "Dammit, Janet" sing-a-long, but tonight I was reminded of this dance and I ended up with an easy, fun dance stretch for my tight shoulders and back.


For those of you who may not be familiar with "The Time Warp," here's a video introduction. It's basically a short 5 part mini dance routine that involves moving the feet, knees, and hips.

Sounds easy (and it is!). Start with feet hip distance apart, toes slightly angled toward each other. I like to do it in the kitchen with my feet on the tiles so I can easily tell if my feet are moving evenly.

1) Just a jump to the left... If you're on the tile, as I like to be, start with each foot on either end of a tile. Which soft (knees), take a LITTLE hop to your left, landing with the space still between your feet (or as much space as you can easily muster...).

2) And then a step to the right... Step to the right and bring your left foot along, too. End with the feet the same distance that you started with.

3) Then put your hands on your hips... Make this move big! More fun and more effective.

4) And pull your knees in tight... With bent knees and hands on hips, bring the knees together.

5) Then do a pelvic thrust... With the knees still touching, hands on hips, thrust your hips forward and back to neutral 4 times. And then you've gone insane... Because you just did The Time Warp!

Let's do The Time Warp again? Yes, please. Repeat on the other side (jump to the right, step to the left). Feel which side is easier for you to do. For me (left curving scoliosis) the jump to the right side is much harder but just as fun.

Now... to find a Rocky Horror midnight showing and show off my skills! Let's do The Time Warp again!

Thursday, November 29, 2012

Desk Stretches for Scoliosis & Migraines

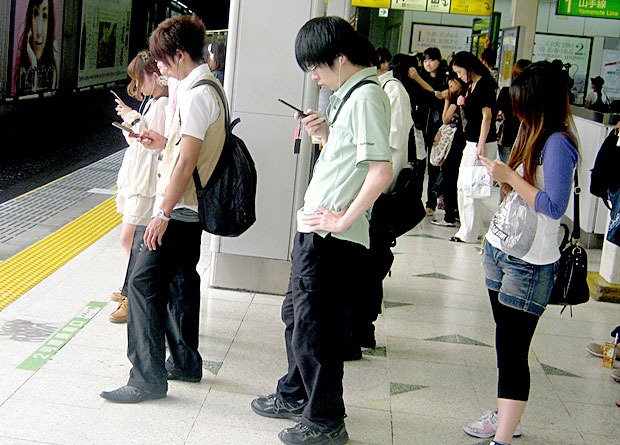
Old habits die hard. It's that time of the year again - finals. This basically equates to my sitting in a chair for hours on end with my head leaning forward and downward into a book. And how 'bout that stress? Doesn't help with my head woes to say the least. This seems like a recipe for disaster and a return to my old, forward head ways.

But I am determined to break this habit! Here are a few exercises that I do at my desk to combat the tension that builds in my neck and upper back.

Bear Hug Stretch


In this exercise, I wrap my arms around my shoulders and give myself a bear hug stretch. It's simple to do and effective; I feel a release in my shoulder blades, my natural neck curve returns (even if just for a moment), and I feel my neck elongating.

Steps to Bear Hug Stretch


1) Any stretch that I do is basically with the purpose of elongating my left side. With my right hand, I reach around the left side of my body to hold onto my shoulder blade (much easier than it sounds). With my right hand still in place, I take my left hand OVER my right arm and hold on to my right shoulder blade with my left hand. It should look something like this:

So, for left curving scoliosis, left arm over right.

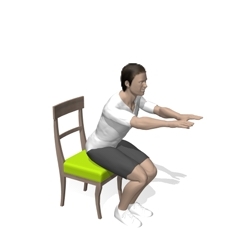
2) Now for the good part! With your shoulders resting back against a chair for support (and to make sure you don't cheat to one side!) slowly raise the elbows up and toward your nose. You should naturally feel the urge to raise your head, so go ahead and raise your head ever-so-slightly. Just remember to always keep space between your chin and your elbows or else you may end up crunching up your neck and not get the full neck elongation effect of the stretch.  To make sure that my shoulders are even, I like to gently press my middle finger around the shoulder blade to keep my hand and shoulder blade connection secure.

3) At this point, your elbows should be a bit higher than shoulder height with your head slightly raised so that your eyes are looking slightly above the level where your monitor (or book) is located. Maintaining this position, slightly arch the back - SLIGHTLY! When I arch, I usually feel a good release around my cervical neck area and around my right shoulder blade. Be sure that both feet are evenly planted on the floor throughout the entire exercise.

Remain in this slight arch, elbows up position for a few breaths. For an even deeper stretch, I sometimes gently turn my head to the right while in my elbows up, slight arch.

This exercise takes a whole of 15 seconds to do but works wonders for relieving built up tension from hours of study. I try and do it at least every 30 minutes of desk time. Experiment with different hand-to-shoulder blade positions to stretech different parts of your upper back.

Knee-to-Desk Exercise

This exercise sounds a little unusual for a work-related exercise, but it's discreet and I find that it stretches my lower back, an area that is typically tight in scoliosis sufferers.

Steps to Knee-to-Desk


1) Put your butt all the way in the back of the chair and keep your back pressed against the seat back of your chair. This creates a nice firm base of support. I like to hold onto my arm rests to feel balanced during the exercise.

2) Place both feet flat on the floor about hip width apart at 90 degree angles with the toes slightly pointed toward each other (make yourself slightly pigeon toed for this exercise).

3) Making sure to keep your butt and back pressed against the seat back of your chair, slowly raise one knee and touch the underside of your desk. Slowly return your foot to the floor.  Keep the foot in the same exact pigeon toed position during the up and down movement. Repeat on the other side.

You should be working your deep abdominals to do this exercise. If you feel the work in your thigh (quadricep), reposition your feet on the floor to turn in your toes a little more (pigeon toed) or even bringing the knees together. This makes the exercise a little more difficult and also ensures that you can't cheat quite as easily. Also, be sure not to lean from side to side when you alternate lifting legs. If you're doing that, then you're not allowing your core to do the work. If the Knee-to-Desk movement is tough to start with, make it smaller (bring your knee up only a little) until you can work up to touching the desk.

This exercise stretches my lower back and I can feel it all the way up through my shoulder blade. I've seen a lot of desk leg lift exercises where the leg is lifted straight out. Although I think that movement would certainly be better than nothing, I find that starting with this smaller, more targeted movement helps my body learn how to control itself better at the core and allow me a more significant stretch.

Elbows on Desk Stretch


I know, I know, you shouldn't have your elbows on a table... not to mention, chronically keeping your elbows elevated will probably worsen neck tightening. But if I do this movement in a targeted way, I find the stretch relieving to my shoulder blade tension.

Steps to Elbows on Desk Stretch:


1) Put your butt all the way in the back your chair, creating a firm base of support.

2) I like to clasp my hands in a easy prayer hold (usually with my left thumb on top).

3) Put elbows on top of your desk with the hands lightly clapsed together. Your hands will be around eye level.

4) Slowly roll your chair backward with your feet, creating an easy, gentle arch in your back. If your chair doesn't roll, then pre-place your chair however far away from your desk as you'd like before you begin the stretch.

5) While in your gentle arch, slightly raise your chin so that you are gazing directly above the hands.

For a deeper stretch, bring the elbows closer together atop your desk.

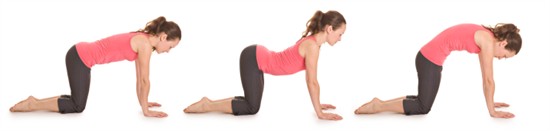
It should look sort of like this (with you seated of course and not on your knees - feel free to try on your knees though if no one is watching!):


This streth releases my lower back as well as my shoulders and feels oh-so-nice.

Try these 3 exercises as often as you can to release tension in the upper back and neck.

Happy desking!

Friday, November 9, 2012

Upside-Down Dog: Car Stretch for Scoliosis & TMJ

If you've read my previous posts, you probably know that I like to use my car as a source of stretching inspiration. One of my favorite car stretches to do is to use my roof to do what I consider a modified down dog yoga pose, or what I like to call "Upside-Down Dog."

Hm. Down dog in a seating position? Try it before you dismiss it! I think it's actually a great way to understand the feeling that your shoulders and arms should have when in an inverted, true down dog yoga pose.

Upside-Down Dog Car Stretch Instructions:


1. Seated in your car, at a stop light or while in your driveway, put both palms up on the roof of your car with the thumbs pointed toward each other. The arms should be about shoulder width apart. The elbows should be straight but not locked in a rigid manner. You don't want to bring tension into your upper back while doing this exercise; in fact, you should aim for the exact opposite - upper back relaxation!

2. Relax the neck and allow the head to gently glide backward, giving yourself a double chin. Try to bring the ears in line with your upper arms. When I do this, I feel a release in my upper back and cervical spine (neck) area. The nose and eyes should be directed slightly upward, as if toward the clouds, but try not to raise the chin to achieve this end.

3. To get a deeper stretch, give yourself a slight arch in the back. Remember, the key word is slight! Check out my post about how to do a slight arch. It's important not to push your muscles too much, especially if you  have chronic muscle tightness and misalignment from scoliosis. I like to use the steering wheel to brace my knees and provide a strong base for my slight back arch.

Forward head posture has caused a lot of us to have neck tightness, upper back tension, and a loss of the natural C curve of the cervical spine. This exercise is an easy way to re-train these muscles and help them return to their neutral state. As your muscles learn to relax, try bringing the thumbs closer together, eventually ending up in a lovely seated sun salutation pose.

Beautiful sun salute

We spend so much time hunched forward! Think about it: do you look like any of these people? I know I do...
On a cell phone and laptop (Me: guilty...)

 
 Driving with chin jutting forward (Me: guilty...) 

 Relaxing at home on a laptop, looking downward (Me: guilty...) 
Work. (Who isn't guilty?) 

Turtle back? (Me: guilty...)

Next time you practice yoga, or just want a simple neck stretch, try to remember the feeling that you gave yourself while practicing this "Upside-Down Dog" pose. You can bring this feeling into a variety of yoga poses.

Happy Upside-Down Dog-ing!


Monday, October 22, 2012

Driving Wheel Stretches for Scoliosis & TMJ

I get some of my best stretches right behind the wheel during my long commutes to and fro. Some people might say, wait, should you be stretching while driving? I say, for me, why not? I don't think there's an Oprah pledge for this one...
 

Steering Wheel Stretch #1: Open Shoulder Stretch

I have left curving scoliosis so I try and find way to passively lengthen my spine as often as I can.

Put your left elbow on the window sill and hook your thumb in the armpit (axilla, anyone?), sort of like you're about to do the chicken dance. Not cute but very practical. :/ Anyway, put your right arm up and back against the passenger seat, sort of like people do when they are backing up. Using the knees, slightly brace yourself against the base of the steering wheel. This gives you a strong base of support and also ensures that you can't move your knees when / if you decide to take the stretch to the next level (engaging and slightly lifting the lower abdominals!).

Having both shoulders open and stretching out the tight pectoral muscles from my forward head posture feels great. The chest muscles are tightened in forward head posture (check out this picture of forward head posture which I have). This passive exercise is a good way to loosen these muscles up and help release the tightness that is pulling the shoulders forward. 

Take some really deep breaths in this Open Shoulder Stretch to give yourself a slightly deeper stretch. Really try to make sure that the with the "in" breath, your belly pokes out like you just had Thanksgiving dinner. This makes sure that you are using the diaphragm and that you are allowing air into the belly evenly on both sides. For me, it's hard to expand the lower right quadrant (part) of my abdomen because of my scoliosis induced tightness. Happily, when I expand it, I usually feel a nice spinal release.

Steering Wheel Stretch #2: Wheel Arch 

This one is one of my favorites to do at a stop light. I usually hold the pose for the length of the red light for a series and deep breaths and then release it when the light turns green.
Put your  hands on the wheel at 10 and 4 o'clock. (Check out my post titled the same about why this might be a good idea for you if you have back problems.) With your hands on the wheel, lean forward at the waist to keep your spine really really really straight. Bend your elbows and staying in your leaning forward position, arch your back all the way up to the top of your head. Try to point your sternum (breastbone) toward the middle of the wheel. Your eyes should be gazing straight out onto the horizon if you are doing this right. If you are looking up to the sky, then your arch is way too big and you are at risk for hurting your neck.

If you have some serious tightness in your back from scoliosis (like I do), this arch should take a little effort but it should be worth it. Nothing too crazy, but it's a little harder than if you had no deep muscular torso tightness.

To make the Wheel Arch a little more challenging, at the end of the above described pose, raise the elbows up and outward. Take some deep breaths in this position and you should feel something pretty nice.

Don't forget to make this arch a SLIGHT arch (check out my posting on this topic). You don't want to overdo-the-do and hurt your back. I think sometimes these smaller movements are harder to do because you really have to engage each muscle individually instead of relying on momentum or the like.


Here's a great photo of a Wheel Arch. This woman has her hands on her side; I prefer to use the wheel to stabilize my core. 

My scoliosis and endless hours of driving have inevitably forced my steering wheel and I to become one unit during my commute. Use this to your advantage to think of creative ways to stretch your upper body where so many of us carry stress and tension.

Peace and love.

Thursday, September 20, 2012

Bedtime Yoga Sequence: TMJ and Scoliosis Exercise

I've always wanted an easy bedtime yoga routine to do right before getting into bed. Last night, I decided to create one and my back more than thanked me for it.

I was inspired by this photo of a pigeon pose on the bed from Pinterest...

Source: fitsugar.com via Vicki on Pinterest


Bedtime Yoga Sequence:


1) Start in a table top position on all fours on the floor next to your bed. Give yourself an easy cat / cow pose from this all four position.


I like to spend 2 breaths in each position - 2 breaths with a neutral pelvis; 2 breaths with an arched back in cat pose; and lastly, 2 breaths with a curved / hunched back in cow pose.

Really remember to physically move your belly with your 2 in-and-out breaths. It will really help to get the most out of the spinal mobilization that you will feel as a result of this movement. I know it's not sexy, but that's not the point of this yoga exercise. No one is watching other than your God.

Don't forget that your head is included in your spine and should therefore also move with your back as you do cat / cow, especially for scoliosis sufferers. 

2) After you finish your cat / cow pose, return to a neutral pelvis and flat back position. From here, I like to push my booty backward and upward to the sky while keeping my hands in the position they were in in the all fours. This is a variant of child's pose.


-or-
 
This position gives me a great lower back stretch and a great stretch through the shoulder blades and back of the neck. 

Spend about 4 breaths in this position because it is really easy and it feels really good. :) Try to picture pushing your breastbone to the floor to get a deep yet easy arch to the mid-upper back.

3) Next, ever-so-slowly, roll your spine up one vertebrae at a time to an upright seated position. Don't forget your head should be the last to roll upward and arch the crown of your head slightly back.


You can either have your toes curled under your booty (like in this photo), or with your toes straightened (as pictured in the two poses above). I prefer to sit with my toes straightened.

For fun and an extra stretch, give yourself a seated cat cow yoga stretch in this seated position.

4) Return to all fours. Repeat cat / cow pose for 2 breaths in each pose. Now, go into an easy down dog with soft, bent knees.

Bent knees helps you to get deeper into a down dog pose for a better upper back and neck stretch. 

5) From this bent-knee down dog position, lift one leg and get into a 3-legged dog. See my posting on how to best get into this position for maximum pain relief: http://migrainesnomore.blogspot.com/2012/08/down-dog-yoga-pose-for-tmj-spasm.html .


Put your leg back onto the ground and go back into a bent-knee down dog pose. From here, pick up your other leg and perform the 3-legged dog pose again on the other side.

6) Return to a bent-knee down dog, then back to all fours. Give yourself a nice back stretch again (see Steps 2 & 3) and end up sitting on your heels.

7) Now, position yourself on the floor facing right next to the bed on your knees. Using your hands for assistance, place your heel on the bed in front of you with your knee bent and the hip open.

Standing pigeon pose - lower back stretch and deep abdominal exercise > see if you can tilt your hips upward while in this position!
Bed-assisted pigeon pose 

You can either push up on the ball of your floor-foot (as pictured here), or you can remain on your knee. Or (like I do), try a on the ball of the foot followed by on the knee. The knee gives an incredibly deep stretch, yet the softness of the mattress prevents you from overdoing it.

Try your best to keep your hips squared (keep your nipples in a parallel line to the bed) to give your lower back and hips the best stretch possible. 

Try tilting the hips upward in this bed-assisted pigeon pose. You will have to use your deep abdominals to pull your booty inward and tilt your hips upward. It's harder than it looks! This offers and even better lower back stretch once you are already in this bed-assisted pigeon pose.

Repeat the bed-assisted pigeon pose on the other leg, of course.

7) To end the sequence, I give myself a nice, deep shoulder stretch, using the edge of the bed for leverage.


Now time for bed. You will sleep like a baby after this easy yoga sequence.

Namaste!

Thursday, September 13, 2012

House Gym Part 1 - Sofa Squats: Home Scoliosis & TMJ Exercises

Incorporating scoliosis exercises into your daily routine is the quickest way to see results. I try to create a new way to use pieces of furniture around my house in a way that gives me a nice spinal stretch.

Sofa Squats for Scoliosis


When I go to a group exercise class at the gym and the time comes to perform squats, I always cringe. Squats should be performed in a manner that looks like you are literally about to sit up nice and tall in a chair. Unfortunately, most people at the gym look like they are about to pop a nice squat appropriate for primitive camping only, if you catch my drift. You do not want to have your shoulders leaning way forward; right before you reach the base of your squat, you should look at though are perfectly upright in an invisible chair. If this is not even a little bit hard, then you probably are not doing it right. :/
 
(Photo courtesy of this website.

So, where does the sofa come into play? Well, instead of just assuming that you are that person at the gym doing squats properly, try them on the sofa.

How to Perform Sofa Squats


From a seated position, push straight up with your thighs to a standing position. Don't use your hands! Can you do it? This was just your self test; adjust your difficulty level by leaning your shoulders every-so-slightly forward to give yourself the momentum to stand. You goal is to have your spine as straight up and down as possible while you stand from the sofa. 

This drawing nicely illustrates the upright shoulder position you should aim for when squatting. 
(Drawing courtesy of this page.
You will feel an amazing stretch in your lower lumbar spine, especially on the tight, scoliosis side, not to mention your booty will begin to look nice and toned.

Now, pop a squat!

Wednesday, September 12, 2012

Beyonce! Dancing for Scoliosis and TMJ Pain

Beyonce back bends her way through most of her music videos, which is great for us scoliosis sufferers! I decided to start gathering some of my favorite back bends from her videos to work on my spinal mobility while improving my booty-popping ability.


Music Video # 1: The The "Uh-Oh" Dance, Beyonce - Crazy In Love


You know you're as guilty as I am: we've all attempted the "uh-oh" booty dance from Beyonce's Crazy In Love video at some point.


Performing this "pop" mobilizes the lumbar spine right above the booty and below the ribs.

Music Video # 2: Beyonce - Green Light


This video opens with an easy visual of an easy spinal mobilization + scapular stabilization. To me, it almost seems as if all 3 ladies are almost stationary from the hips upward and they are only slightly moving their hips to achieve the complete body movement.

Screen shot of Beyonce's video Green Light 


You can see from this intro shot that spinal mobilization and also changes to the spine result from very subtle movements of the hips. A great representation of how easy it is to throw the hips and spine out of / into their natural position.

Music Video # 3: Beyonce - Kitty Kat


This video is apparently the extended intro to the above Green Light video. In this video, Beyonce acts and moves like a human kitty kat. To me, she appears to be employing an extended cat / cow without the cow part.


Cat / cow yoga pose is wonderful for mobilizing every vertebra in the spinal column. An extended cat while moving the entire body dancing is an easy, fun, and sensual way to help your scoliosis.

Also, check out my posting on how to properly do a spinal stretch for scoliosis for some extra guidance regarding getting the most out of your extended cat pose!

May the bootyliciousness be with you.

Thursday, September 6, 2012

Fun Spinal Twist for Scoliosis & TMJ

I've been working a spinal twist into my daily routines as often as possible. All of the therapists that I've visited on my journey have commented that I have a severe amount of stiffness in my upper back.

I coulda told you that. :)

So, in an effort to mobilize my thoracic spine, here's an easy exercise that I do while sitting at my desk, driving in the car, or hanging out at home.

Spinal Twist with Arms in the Air

1) Put both arms in the air at 90 degree angles with the palms facing outward. You should sort of look like you are about to start a workout on one of these butterfly workout machines:


2) Now, for the fun. First try the exercise while seated. This will help to ensure that you are evenly working both sides of your torso without the advantage of using the legs to shift your weight.

With both of your arms in the air, similar to the lovely lady in red above, begin to make circles with your arms while at the same allowing your torso and ribs to move in response.

To help visualize this exercise, picture a clock directly above your head. While trying to keep the elbows out to your side, move both hands in circles to point to 12:00, 3:00; 6:00, and 9:00, and finally back on 12:00. Then, try it in reverse to get an even stretch on both sides: point to 9:00, 6:00, 3:00, and back to 12:00.

It should look a little something like this:


3) Give the movement a go in the opposite direction, using the clock visualization to keep you moving in the right direction.

I feel a fantastic spinal twist through my torso, especially on my tighter, right TMJ and scoliosis side.

Once you have mastered this simple exercise, turn on some music, stand up, and perform the exercise in a standing position. This time, add your hips and move your arms in bigger clock-circles.

This exercise is fun and gives me an easy way to perform minor spinal adjustments on myself with an easy spinal twist.


Cool pose for a mild spinal twist that feels amazing for scoliosis sufferers. Try it with your curve-side leg on the top (> for right scoliosis curve and right TMJ sufferers, put the left leg below the right).

Have fun! And please, turn up the bass.

Thursday, August 23, 2012

Sexy Basic Instinct Exercise for Scoliosis

Channel your inner Sharon Stone!
***Note: This posting is not for children or the faint of heart.

A fun and sexy way to stretch my lower back and work on my scoliosis is to place both of my feet flat on the floor, cross my right ankle over the left, and open the knees a la Basic Instinct. If you do this movement slowly and sensually (really channeling your inner Sharon!), you feel a nice stretch through the right and left obliques. Don't cross the legs like Sharon does in this video. Keep both feet planted on the floor and just move the knees. 

I like to do this exercise at my desk or while driving. It's easy and a little fun because of the naughty undertones. 


If you give yourself an easy spinal arch with the knees open showing off your lady parts, you will really feel the stretch!

Don't be afraid to be sensual in the privacy of your own home... :)

Sunday, August 19, 2012

Outdoor Therapy for Scoliosis & TMJ Part 2

If you can't make it camping, then you can still participate in any outdoor activity of your choosing to help with the TMJ and scoliosis pain.

Think back to when you were a kid and couldn't wait to go outside and do [insert favorite outdoor activity here].

If this memory made you smile, then get out there and re-create that childhood happiness.

If you are at a loss for happy childhood activity memories, here are some of my own that you are welcome to try: swinging at the park, dancing like no one is watching, twirling clasped-hand with a friend, swimming, bike riding, rock climbing, etc.

Several acute TMJ pain treatment websites that I came across recommended to do some type of aerobic activity for the pain. In the throes of my TMJ spam pain, the last thing I wanted to do was go to a step aerobics class.

In hindsight, now fresh with my camping insight, participating in some sort of aerobic activity makes sense.

Aerobic activity:


1) Gets the blood flowing to your entire body (including your painful spasming jaw)
2) Makes you focus on something other than the pain as a type of distraction therapy
3) Causes a rush of feel-good endorphins (which are many times stronger than any opiate pain medication you could take).

What childhood memory will you channel?

(Photo courtesy of this blog).

Click here to try out my all natural homemade bug spray. Works like a charm without that annoying greasy feeling. 

Skinnier In Seconds! Scoliosis & Migraine Exercise

We all know we should have better posture. In treating my migraines, I discovered that my posture was the main culprit. After about 3 months of working on my posture, I have stopped having to live with always having to take an Excedrin and Tylenol cocktail just to get through the day.

So, to the point at hand: everyone wants to look skinnier, myself included. An easy to do spinal straightening exercise makes you look longer through the belly (universally loathed body part) which results in looking skinnier and "snatched"through the middle.

Additionally, this spinal elongation stretch is very simple and will improve your posture to combat migraines and scoliosis.

Look Skinnier Spinal Stretch:


1) Lay on the ground or any flat surface on your back.
(After you've gotten the feel of the exercise on the ground, then practice STANDING TO LOOK SKINNIER or seated.)

2) Place your right hand on your right hip bone (even if you can't feel it!).
Palm should be facing down (prone) on the belly. Be sure the entire palm is on the belly.

3) Put the left hand on the left ribcage, palm prone.

4) Push the left side of your ribcage to your right using the pressure from your left palm to move your body.
At the same time, use the right palm against the right hip bone to push your hips to the left.
You should be pushing your left ribcage and right hip toward the midline of your body.

For additional benefit, see if you can practice deep breathing while in this position with the goal of pushing out your lower right abdomen to move your hand with your breath.

Now try this exercise standing up trying to put your body into the same position you were in while on the floor. Check yourself out in a mirror, you sexy, skinnier thang.

Christina Henfricks à la Joan working a sexy spinal stretch. 

Saturday, August 18, 2012

Outdoor Therapy for Scoliosis & TMJ

When my TMJ flared up horrendously a few weeks ago, I was at a loss about what to do for the 10/10 pain.
Google, my Ayurvedic self healing book, and various yoga positions provided a little relief, but the pain kept coming back with a vengeance.

A common theme that I discovered about all the sources that I read: being outdoors helps to relieve stress.
I took it upon myself to find a way to incorporate all of the suggestions that I'd gathered thus far: I decided to go camping.

Turns out it was a fantastic decision. Within hours of being at the campsite, my 10/10 TMJ pain that had prevented me from getting a full night's sleep for 7 days was most at a 2/10 at it's worst.

I attribute the pain relief to several factors:

1) Fresh air

Taking a deep breath of fresh, pollutant free air is a wonderful way to easily clear the mind and begin the path to relaxation.

2) Yoga

Being outside with few electronic gadgets makes it easier to do something other than watching TV.
My activity of choice when I'm in pain is yoga. I don't go overboard with any particular pose. As a matter of fact, one of my favorite camping yoga exercises is simply relaxing in my hammock. Easy as pie - it takes a ZERO effort and helps me to relax both my body and mind.
I think of camping as my very low cost alternative to one of those expensive yoga retreats. Cost is about $20 a night.
Completely worth the cash.

3) Setting Up Camp

Setting up a good campsite takes a little skill - both mental and physical. You have to work pretty hard to put up a tent, mosquito-proof your campsite, and stay hydrated in the August Texas heat.
This probably doesn't really sound fun because it isn't. However, that isn't the point of the activity.
Using my mind and body to set up a nice campsite all by myself provides me with the ultimate DISTRACTION THERAPY. Think about it: you are.(desperately) trying to pitch your tent before you lose the sunlight and are forced to sleep in your car.

In this moment, these hours, the LAST thing you are thinking about is the nagging pain in your jaw or back.

Distraction therapy, meet yoga.

Turns out they were friends in a former life. :) Their souls get along splendidly; your body thanks you by releasing any tension or pain you may have.

No more pain. Life is good.

Happy camping, campers. :)


Happy campers...

Click here to try out my homemade bug spray. Works like a charm without that annoying greasy feeling!

Thursday, August 16, 2012

Arching the Back for TMJ & Scoliosis

I often employ a very slight arch to my spine when I do my scoliosis oriented exercises.

The key word here is SLIGHT! It is important not to exacerbate my back problem, so I try my best to make all of my movements incremental and slight. That way, the risk of further injuring my back is reduced.

When I arch my back, I always always always arch when my lower abdominals are engaged. When I say "engaged" I don't mean any crazy crunching antics. I mean that I start at my spinal "root", employing the same idea/action from this movement using the foam roller to engage my low, deep abdominals.

It helps for me to picture engaging these lower abdominal muscles on a long IN breath for a count of 4. With each count, I raise my lower hips ever so slightly. The end position that I aim for is almost as though I have raised my lower booty off of the ground or chair that I'm in. This movement should be TINY. You should feel the bulk of the movement going on INSIDE your body. If someone across the room can see that you've done this lower abdominal engagement, then you're movement is way too big. The point of this exercise is to work weak muscles that you rarely use. So, slow your roll! And take a nice slow IN breath for a count of 4, engaging the lower abs while you do it.

Once you have engaged the lower abs, it's time to begin to SLIGHTLY arch the spine. Remember to maintain your hip position that you worked so hard for in the step above!

Stabilize the shoulders on a flat surface like a chair or a wall. Put your hands either on the floor next to each hip or each knee. Now to begin the arch. Start by slowly giving yourself a double chin. Use the base of the back of your head where your hairline begins as your guide. Remember to keep your awesome hip position from above!

Once you have your double chin AND your lower abdominals are completely still, then comes the last part of the arch: pick an imaginary spot on the wall in front of you at nose level. Using the tip of your nose as a guide, draw a 1 inch going up the wall from the imaginary spot you chose. You should feel a GREAT stretch throughout the back and up through the thoracic spinal region.

Remember, keep your hips and lower abdominals 100% stable! If you don't, you risk further damage to your lower back. Bad news.

You may not be able to execute this SLIGHT back arch quite yet. But the point in that it took you years to get where you are, so it's going to take more than reading this blog one time to fix your problems. Take your time and your body will thank you. I am already feeling wonderful benefits from the exercises that I have started to practice.


Tiny movements! Namaste.

Pool Noodle for TMJ & Scoliosis Treatment

If you don't have a foam roller try the Foam Roller Fun scoliosis exercise, then an inexpensive alternative for TMJ and scoliosis therapy is to use a pool noodle.

I picked up my pool noodle from WalMart for under $2. These things can be difficult to easily get a hold of outside of pool season (e.g. summer), so be sure to get one while they are still stocked for the summer months.

Hopefully by now you've been able to check out my post on using a foam roller for TMJ and scoliosis pain. I use the pool noodle the same way.

Pool Noodle vs. Foam Roller

The main difference between using the larger, more rigid foam roller is that the foam roller is much more rigid and therefore does a better job when the job is TOUGH (read, acute pain, TMJ spasm, etc.). I use my pool noodle more regularly to maintain the balance of my body so that it does not progress to needing the foam roller.

My favorite way to use the pool noodle in on my commute to and from work. All of those endless hous in traffic has led me have an even worse posture that I started with (which wasn't that great to begin with). I'm determined to combat my terrible car posture.

I modified my pool noodle by simply cutting it half. The things are quite long and can be annoying if not compact enough. Additionally, having 2 pool noodles allows me to always have 1 in the car and 1 in the house for use wherever I am when I need the pool noodle.

Take the pool noodle and place it perpendicular to your car seat. It should like at just about the level of your shoulder blades (scapula). I use the pool noodle to stabilize my shoulder blades and back. Lean back onto the pool noodle. This should not be painful at all. I feel a nice lifting and stretching through my right torso and a release of tension in my lower back.


Try to use only your shoulder blades to keep your back stable against the pool noodle. This isn't a difficult action; it's just one that takes a little bit of practice to really feel as though you are engaging the  shoulder blade (scapular) muscles

Remember that this action can be done on any stabilizing surface. I choose my car as my go-to method  because I spend way too much time in there. Additionally, although I think car seats are generally poorly designed, headrests provide a great actual goal to reach: try and pull the base of your neck up and back so that your head rests as comfortably as possible in the headrest. Tougher than it seems but worth the effort, especially if you have neck problems. Don't strain to reach the headrest with your head; just try your best. Remember to use the base of your neck where your hair begins as a guide when pulling in the chin to reach the headrest. 

Experiment with your body positioning with the pool noodle behind your shoulder blades. A personal favorite of mine is to take a deep breath IN and on the long OUT breath quickly raise my hips by doing a tiny lower ab crunch. I always get a nice release on the right side of the body when I do this. So easy and so gratifying. Not to mention the pain relief.

Safe driving!


Finding Your Throat's Center: TMJ and Scoliosis Treatment

Try this: standing in front of a mirror, close your eyes and use your non-dominant hand to point to your voice box.

Now, open your eyes. Were you even close?

Apparently, my throat is off center... by a lot. When I opened my eyes, my left index finger was pointing on the left side of my neck, barely even on a visible part of my throat. Yikes.

Taking your non-dominant hand to perform the movement forces you to step away from the muscular memory in which your body is used to performing everyday muscular movements. In my case, my right side is overdeveloped and therefore ridden with painful trigger points. The tightness spans all the way from my right jaw to my right tailbone.

So, to work on this OBVIOUS left deviation of my throat (including my voice box aka larynx), I have a few exercises. I try to keep it light and fun; otherwise, there's no way that I'm going to keep up with these exercises.

Exercise 1 for Throat Deviation


1) Using your regular, dominant hand (for me it's the right hand), make a peace sign with your first two fingers. Hold this finger position for the entire exercise.

During this simple preparatory finger positioning, I actually feel a nice stretch and strengthening motion in my right shoulder blade.

2) Rest your back against a relatively rigid surface. I call this action "stabilizing". When I stabilize my back, I use the tips of my shoulderblades to act as a "glue" to the stabilizing surface. Try not to move from your "stable" stabilization position. 

You can use anything to stabilize your back. Since we are all driving all over the place for hours on end day after day, I particularly enjoy doing this exercise in the car.

A number of other easy places to stabilize the back for this exercise are: 1) against any wall; 2) laying flat on the ground; 3) in your office chair at work; or 4) in the car. 

So, stabilize your back against a wall. Make the peace sign with your dominant hand (my right hand).

3) Bring up your right-hand-peace-sign to eye level with your palm facing outward. This gives me a lovely right shoulder blade stretch and really opens up my right nostril and throat.

4) Bring the right elbow back to the wall (or whichever stabilizing surface you are using). This should feel heavenly! Enjoy this position for a few deep breaths from the belly. You can even slightly arch the back for a wonderful stretch through the peace-sign-hand side of your body.

5) Shifting the entire right arm from the shoulder joint and with the palm facing outward, take the INDEX FINGER and place it on the right collarbone. Try your best to get the finger on the part of the collarbone where the breastbone + collarbone + throat dip between the collarbones meet. Be sure to keep your peace sign intact and strong! Strong fingers will give you a good amount of gentle traction for this exercise to be effective.

6) SLIGHTLY turn your right head to look to your right. Chin should be directly over the right collarbone.

7) Using very small and gentle movements, slide your right index finger up less than 1 inch to press against the tendon closest to the clavicle. Apply gentle pressure with your index finger to the right neck tendon.

Spend a round of 5 deep breaths in this position. Try to remember to keep your right elbow as close to the wall as your can and keep your peace sign strong. If your middle finger presses up against another tendon on the lateral side of your right neck, don't freak out. That is where I usually take this movement next; but that is for another post.

It helps if you relax as much as you can and pull your chin in (give yourself a double chin) while in this position. Go with what your body tells you. If you are really tight like I was, then you may have a hard time achieving the index-finger-collarbone position.

Remember to take your time and listen to your body. These movements are slight but carry a lot of power. As always, try the exercise on the other side of your body to see if it feels any different.

Throat massage blog.


Peace and love!

Tuesday, August 14, 2012

Drive With Hands at 10 & 4: TMJ & Scoliosis Treatment

An easy lifestyle change that I try to employ as often as possible is very simple: drive with my hands at the 10 and 4 clock positions.
 
This action pushes my right shoulder down and slightly back while simultaneously pushing my left shoulder up and slightly forward.
 
Experiment with different hand positions to hold the steering wheel. I usually go with holding the wheel with my palms facing outward (supine - the palms should touch if hands are brought together.)

Pay particular attention to working on pulling the right shoulder blade moving down and slightly back.

This easy change gives me a counter-stretch for my torsion (twisting). It also opens up the entire right side of my right shoulder joint, chest, ribs, and upper back.

Try it!
Back pain caused by repetitious damaging posture while driving, pictured above.

Is your driving posture making your back pain worse?

Hammock Relaxation for TMJ Pain

I don't think I've ever been in a hammock before. However, since camping is one of my new favorite hobbies, I thought now would be the perfect time to give it try.

The verdict: a hammock is a great way to reduce stress AND practice some easy spinal exercises to help my right TMJ and left curving scoliosis.

In typical "me" fashion, I made the following positioning adjustments to more specifically address the torsion (twisting) in my back that has developed due to my scoliosis.

Adjustment 1 - Straddle to Get On Hammock: 


Enter the chair by straddling the hammock with both legs. Maybe this is how all people enter a hammock; more power to them and their spines if that is the case. When I straddle the hammock, I'm using both of my inner thighs to hold my body up. This works to align the very base or "root" of my spine. Having a grounded base (ground chakra exercise) functions like the "roots" of a tree to ground my entire body. My spine then follows, allowing it to be as straight and balanced as possible. Hold this position for as long as you wish.

Adjustment 2 - Left Toe Point:


With my entire body now in the hammock, legs straight-ish in front of me, I take my left leg and point my left toe to the to corner of the hammock. This pushes my right hip out of the way to the right. Just put the right leg anywhere right now. Your left hip should automatically move upward and your right hip will subsequently move downward. (The is a very slight spinal twist in the OPPOSITE direction of my scoliosis torsion.) My hips feel much more balanced and equal in this position. I focus on really pushing downward and slightly upward with the left hip for my right TMJ pain.

Adjustment 2 should look something like this with the left leg up (the right leg is up in this photo).
 
Using a hammock makes me feel like I'm getting an experience similar to those innovative looking aerial or wall yoga classes.

Here is a photo of an aerial yoga class: 


Namaste!

Monday, August 13, 2012

Easy Yoga Inversions & Push Ups for TMJ & Scoliosis

I have been trying to work my way up to a pull up on my boyfriend's over-the-door home pull up bar. Boy, that is easier said than done. Suffice it to say, I'm still quite-a-way's away from achieving that feat. Frankly, I'm impressed anytime I see anyone do a pull up.

So, in an effort to improve my upper body strength, I have been employing a few specific techniques. 

Technique 1 For Lady Upper Body Strength Building: Push Ups


When I hear those 2 little words (push ups), I picture wimpy ladies falling out everywhere. I'm ashamed just thinking about it, especially since I was / am one of those weak ladies. 

Well, I'm tired of being a wimp.

I started by doing "wall ups" to begin to teach my body how to complete the required moves for a full push up. This is actually a simple AND effective means of engaging and building up the musscles required to do push ups. "Wall ups" are easily modifiable to any skill level. I mean ANY skill level. 

Example of "wall ups" done very well. I would call this level of execution a medium difficulty level. Start with the arms higher up on the wall to make the exercise easier. You will still feel the burn! 

Technique 2 for Lady Upper Body Strength Building: Pole Inversions


At the very first pole class I ever took, I learned this move. I can't remember what it was called, but as with most pole dancing BEGINNER MOVES, it is surprisingly simple to achieve. 


The language of the video isn't very helpful (it's almost self-defeating
for pole newbies), so I usually just watch it on silent. :/

This position is one that looks legitimately harder than it is to achieve. Go ahead and give it a shot with one leg and see how your jaw feels. For right jaw pain, focus on getting your left leg up and behind you. Work up to getting both legs up, then eventually grip the pole with your knees.

Technique 3 for Lady Upper Body Strength: Inversions on Any Wall


Pick a wall. Any wall. You might want to start with any bare wall in your house and become more emboldened as you increase your strength. Basically, do the exact same movement that you did (or maybe didn't) attempt on the pole in Technique 2: Handstand Pole Inversion.

Try to wear some footwear that has a bit of traction. You can use the traction to help hold yourself up by your feet, especially if this position is a new movement for you. Plus, if you begin to slide down the wall on your feet, you can use the traction to apply the brakes until you regain control of your body. 

  • To make this exercise easier:
    • 1) Start by putting up one leg at a time. Work toward getting both legs on the wall.
    • 2) Start farther away from the wall and move closer as you become stronger in your upper body.


Happy inverting!

Go Swimming! TMJ & Scoliosis Exercises

Go swimming if you can to help with TMJ pain.

Here in Texas, in the dead of a long August summer, a swim sounds more than refreshing. Also, if you have kids... take them to the pool! Nothing knocks kids out better than an entire 8 hour day at the pool. For you moms out there, that means a decent amount of quiet in your home that night. Just saying.

I went swimming earlier today and it was so long overdue in this my bout of TMJ spasm. The water was the perfect temperature: not too hot nor too cold, so it did not irritate my jaw or teeth. Also, the MOTION OF SWIMMING involves the entire shoulder, upper back, neck, and jaw area. I used my right arm as much as I could, using the water as a type of muscular resistance training. Did a casual backstroke using only my right arm as the propeller. Felt great to be moving my right arm again with NO PAIN. I emerged a better-breathing woman.

If you can't find a swimming hole (or are just not in the mood to leave the privacy of your own home), you can also do "The Swim" a la 1960s American Bandstand.

I say do what you gotta do. No judgments.

I particularly like the left arm up + right hand pseudo-squeezing my nose as I shimmy down vertically. Feels great on the right TMJ spasm and clenching.

Before Olympic spirit wears off, head to the pool and channel your inner Michael Phelps. And doesn't each of these guy's back position look amazing for stretching out your neck and alleviating your pain?

 
Go for gold, however you can!

Toe-to-Toe Resistance Exercise for TMJ & Scoliosis

This exercise can be done in any position. My top 2 favorite positions are: 1) laying on my back in bed before bed; 2) sitting in the car, particularly at long red lights.

The Toe-to-Toe Resistance Exercise Goes Like This:

Step 1) Lay on your back (or any position that grounds your hips and should blades against a hard, flat surface).
Step 2) Put the tips of the inside edge of your big toes together. Push your toes together, trying really hard to pay attention to how much pressure each toe is contributing to the exercise. When I do this, my left toe is noticeably the weaker party. Eek. Anyway, figure out which is your weaker toe and make note.
Step 3) Put one toe slightly on top of the other (example: place left big toe about 1 cm over the right big toe).
Step 4) Push down with the top (left) toe on the bottom (right) toe. Simultaneously push upward with the bottom foot in an effort to keep both sides of leg muscles balanced. Try to realize which muscles you are working when you press down. Push down with the top toe for 5 in and out breaths.
Step 5) Change to push up the top (left) toe with the right (bottom) toe. Try to pay attention to how this tiny change feels so different in relation to your hips, inner thighs, and even your jaw. Push up the top toe for 5 in and out breaths.
Step 6) Repeat the exercise on the opposite side.

I would recommend starting this exercise right before bed. It's the easiest time because you already have an excuse to be laying down and on your back most likely doing nothing. Also, if you are trying to be clandestine, you could always leave your legs straight and complete the exercise. Hardly even noticeable, really.

Thanks website for the great picture of the "yogi grip." Please note, this is NOT A PHOTO OF THE EXERCISE!! I couldn't find an exact representation of the movement, so I decided to include this 'yogi grip' photo in lieu of it. More knowledge about the practice of yoga couldn't hurt, I'm thinking.

Anyway, I do the Toe-to-Toe Resistance Exercise in the car at long red lights, especially during rush hour. During rush hour, I'm generally annoyed and may even start to get a headache. By employing the Toe-to-Toe Resistance Exercise, I'm balancing the muscles of my inner thighs, booty, back, and neck. This results in immediate relief of not only the physical tension but also the stress of the day.

Take some nice deep breaths for as many rounds as you can (until the light turns back to green).

DISCLAIMER: Do not attempt to practice this exercise in the car if you are not someone that most people would consider to be a "reasonably prudent person" or if you seem to always be getting moving traffic violations. Be sure to PUT YOUR CAR IN PARK if you decide to participate in this exercise while stopped at a red light. This blog nor I claim any responsibility for the activities of those who do not heed this warning or employ common sense!

Drinking Room Temperature Fluids During TMJ Spasm

Today has been my most pain-free day in about a week. I was starting to lose faith there for a minute, so I'm glad to be feeling some relief.

I decided to stay away from any 'ultra' temperature fluids today after a horrible spasm last night after combining hot soon after drinking something cold. All I have had to drink today is room temperature or slightly cool water with a splash of lemon. Why lemon? Helps the medicine go down. I love to drink anything with lemon in it, including water. 


When I drink, I try to push the fluid instantly down the center of my mouth and down the center of my throat. I try not to give the fluid time to linger in either the left or especially the right side of my mouth, particularly if the fluid is cold or hot. When 'ultra' hot or cold temperature fluids sit in the back right corner of my mouth / throat, I get a crazy spasm and instantly want to cry. When I push the fluid quickly back through my mouth, I'm using the muscles at the back of my throat to swallow the water; whereas before, I was letting the fluid linger on either side of my mouth and hence being swallowed on one side of my mouth or the other.

This movement strengthens my throat muscles that are weak as well as those that are in spasm. I feel my right jaw relax when I use this deliberate drinking method. 

Bottom's up!

Follow Me on Pinterest